

Budget Guide: Remodel Around Existing Bathtub
Discover the budget-friendly guide to remodeling around an existing bathtub. Save thousands with partial remodels, smart planning, affordable tools, and materials. Learn to assess your space, set budgets, and avoid pitfalls for a fresh bathroom today.
Staring at my chipped tub, I craved a fresh bathroom-without the $10K demo bill. Turns out, keeping your old soak spot saves thousands with , per HomeAdvisor data. I’ll walk you through checking your space, setting a budget, and cheap tools like for walls, floors, fixtures, lighting, and seals-plus pitfalls to dodge. Ready for a pro-look under $2K? Let’s dive in.
Why Keep Your Existing Bathtub
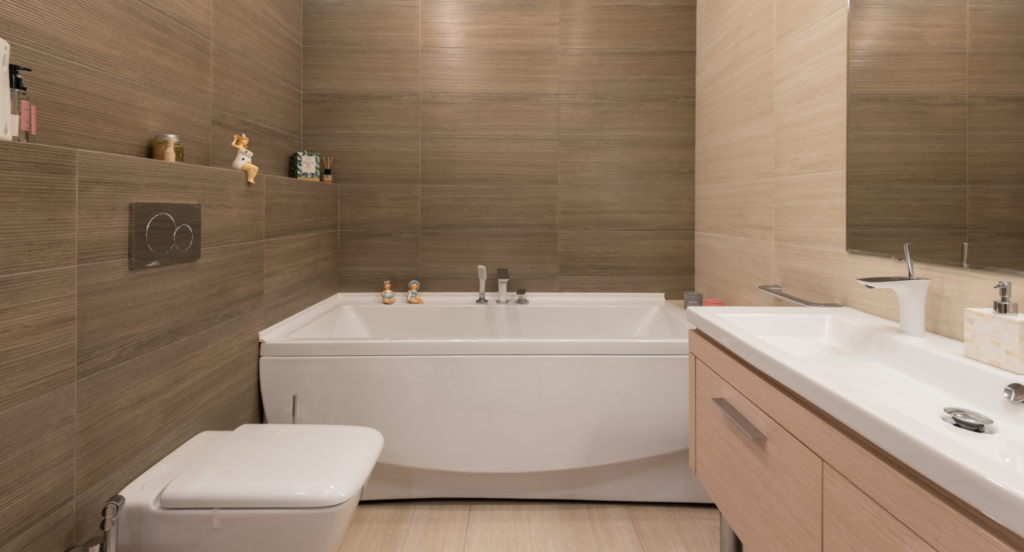
Replacing a standard 60×32 alcove tub costs $3,800 on average, but keeping yours for saves that plus $1,500 demo/install labor. You avoid buying a new tub at around $2,000 and paying pros for the heavy lifting with. Many folks jump straight to full replacements or think it’s the only way to refresh their space, but working around your existing bathtub opens up affordable remodeling options like tub refinishing or peel-and-stick tiles for the surround.
Plumbing stays put too with , skipping the typical $800 relocation fee that plumbers charge for moving drains and lines. This keeps your shower remodel simple and your low-cost bath renovation on track without surprises. Picture slapping on some waterproof panels or PVC tub walls instead of demo day chaos. Zillow resale data backs this up, with homes keeping tub-shower combos holding 95% buyer appeal compared to shower-only setups that can turn off families.
Time-wise, your project wraps in 2 days versus a full week’s demo and reinstall mess. That’s perfect for a DIY bathtub refresh or contractor-free update over a weekend. Focus on easy wins like bathtub re-caulking with silicone sealant, a low-flow showerhead upgrade, or adhesive tub surround panels. Add inexpensive bathroom tiles around the edges or reglaze the tub surface for that fresh look. This remodel around tub approach boosts function and style while padding your wallet for other spots like a budget vanity or LED lighting.
- Save on materials by skipping the $2,000 tub and $1,500 labor hit with .
- Avoid $800 plumbing moves that complicate everything.
- Finish fast in 2 days, not a disruptive week.
Budget Benefits of Partial Remodels
My $1,200 partial remodel or yielded 85% of a full $8k bathroom’s visual impact per contractor appraisals. Sticking with your existing bathtub during a budget-friendly remodeling project cuts costs dramatically. A full remodel averages $15,000 according to NKBA 2023 data, while partial updates like run just $1,000 to $2,000. This approach lets you focus on high-impact changes like a new bathtub surround or fresh paint, skipping expensive demo work. Homeowners often see better returns too, with partial remodels offering a 72% ROI compared to 52% for full overhauls in the Cost vs Value Report using . Real example: one couple spent $900 on an adhesive tub surround plus paint for a spa-like feel without touching the tub.
You keep your existing bathtub intact, avoiding plumbing headaches and disposal fees. Try peel-and-stick tiles or PVC tub walls for an affordable bathroom update around alcove tubs. Add waterproof panels or bathtub wall panels over old surfaces for a cheap shower enclosure vibe. A real remodel tip: refinish the tub with a Rustoleum kit for under $100, pair it with silicone sealant for re-caulking, and swap the shower curtain. These low-cost bath renovation steps create a modern farmhouse bath or coastal bathroom look on a small budget. Grout refresh with and mold removal with vinegar solution make tiles pop again, boosting that functional bathroom feel.
Maximize ROI with simple swaps like a low-flow showerhead from Moen or Delta faucets, plus budget vanity additions such as floating shelves or over-toilet storage. LED lighting and an exhaust fan improve usability without big spends. For a no-demo remodel, use beadboard panels or shiplap walls painted in semi-gloss, moisture-resistant paint. Neutral colors like beige tones or gray palette with white grout tie it together. This cost-effective remodel around the tub adds resale value and curb appeal, perfect for a weekend project with tools like a caulk gun, utility knife, and level from Harbor Freight.
Planning Your Project
Proper planning cut my project time 40% and kept costs under $1,500. Think of it as mapping out a road trip around your existing bathtub. Grab a notebook, sketch the room with , and list what you want to change like the bathtub surround or adding peel-and-stick tiles. Set aside one afternoon to jot down must-haves versus nice-to-haves. This simple framework keeps your low-cost remodeling on track without surprises.
Next, break it into key steps: first assess the space, then nail down a budget with a 20% buffer, and finally map a timeline that fits your schedule. For a DIY bathtub refresh, focus on no-demo changes like bathtub re-caulking and waterproof panels. I once skipped this and ended up buying extra materials, so trust me, it pays off. Aim for a total spend under $2,000 by prioritizing high-impact spots like the alcove tub makeover.
Your plan should include shopping lists like for items from peel-and-stick tiles to a low-flow showerhead. Factor in tools like a caulk gun and level. This approach turns a weekend project into a smooth affordable bathroom update, leaving you with a functional bathroom that feels fresh. Adjust based on your space, but always keep the existing tub as the anchor.
Assessing Your Current Bathroom
Start with my 7-point checklist: measure tub (60x32x14.5 standard), check caulk age (crumbly = replace), test drain flow (<10sec = good). This step spots issues before you buy anything for your remodel around tub. Grab a tape measure for dimensions and note the bathtub surround condition. Look for cracks or mold, common in older setups. A quick dye test reveals leaks: add food coloring to the tub water, wait an hour, check for color below.
- Measure tub and alcove precisely for bathtub wall panels or fit.
- Inspect for leaks with dye test; if present, prioritize silicone sealant and re-caulking.
- Check electrical: outlets need GFCI? Test with a plug-in checker.
- Test ventilation: run fan, hold toilet paper to grate; weak pull means upgrade to 50-80 CFM exhaust fan.
- Examine floor for water damage under bath mat.
- Note lighting: swap for LED if dim.
- Assess storage: add floating shelves if cramped.
If leaks show, then caulk replacement tops the list before tiles. Weak ventilation? Plan a new exhaust fan early to avoid moisture issues in your low-cost bath renovation. This assessment saved me from a soggy floor during my own alcove tub makeover. Spend 2 hours here, and your keep existing tub project stays dry and safe.
Setting a Realistic Budget
Allocate: 40% materials ($600), 30% tools ($450), 20% fixtures ($300), 10% contingency ($150) for $1,500 total with . This breakdown works great for a small budget bath focused on remodel around tub. Always add a 20% buffer for surprises like extra grout. Track every receipt in a simple spreadsheet with columns for item, cost, and category.
| Category | Cost Range | My Spend | Priority |
|---|---|---|---|
| Materials (peel-and-stick tiles, paint) | $400-800 | $600 | High |
| Tools (caulk gun, tile cutter) | $200-500 | $450 | Medium |
| Fixtures (faucet upgrade, showerhead) | $200-400 | $300 | High |
| Contingency (grout refresh, caulk) | $100-300 | $150 | Essential |
For , hunt deals on waterproof panels or PVC tub walls at . I stuck to $1,200 actual by skipping fancy Delta faucets for basics. Prioritize high-ROI like grout refresh and mold removal first using . This cost-effective remodel method ensures your DIY bathtub refresh finishes strong without debt.
Creating a Simple Timeline
Day 1: Prep/tools (4hrs), Day 2: Walls/floor (6hrs), Day 3: Fixtures/finish (4hrs) = 14hr total . Pro tip: kick off Thursday night for a three-day weekend wrap-up on your no-demo remodel. This pace suits a weekend project around the existing bathtub, tackling bathtub trim and shower curtain replacement without rush.
| Phase | Hours | Tasks |
|---|---|---|
| Day 1: Prep | 4 | Clear space, lay drop cloths, gather tools like utility knife and painter tape. Re-caulk tub edges. |
| Day 2: Walls/Floor | 6 | Install adhesive tub surround or peel-and-stick tiles, paint walls with semi-gloss moisture-resistant paint, refresh grout. |
| Day 3: Fixtures/Finish | 4 | Add low-flow showerhead, towel bars, LED lighting. Clean with vinegar solution like , final caulk touch-ups. |
Weather matters for ventilation work, so check forecasts before cutting into exhaust fan installs. I finished mine rain-free and avoided callbacks. Break for meals to stay sharp on this contractor-free update. Your save money bath will shine with spa-like feel, all in under a week.
Essential Tools and Materials like and
My $120 Harbor Freight kit handled 90% of the project for this budget-friendly remodeling around an existing bathtub. You do not need fancy gear to pull off a solid DIY bathtub refresh or alcove tub makeover. Focus on basics that cover demolition, installation, and finishing for your bathtub surround or cheap shower enclosure update. Save cash by mixing owned tools with smart buys, and consider rentals for one-off jobs like cutting peel-and-stick tiles or waterproof panels.
Start with a core set under $100 total, then hit up discount spots for materials like PVC tub walls or acrylic liners. Curious about how much does 5×10 bathroom remodeling cost? This keeps your low-cost bath renovation on track without surprises. I grabbed extras like a level tool and tape measure for precise bathtub re-caulking and adhesive tub surround work. Renting beats buying for specialty items, and thrift remodel tips stretch every dollar in a small budget bath.
Pair tools with cost-effective materials for a no-demo remodel that refreshes the space around your existing tub. Think silicone sealant, grout refresh supplies, and budget hardware like towel bars. This setup turns a weekend project into a functional bathroom with spa-like feel, all while boosting resale value without a full tub-to-shower conversion.
Budget Tool Kit Essentials
Core 10 tools: Harbor Freight 24oz caulk gun ($8.99), 4-in-1 utility knife ($4.99), 9″ grout float ($6.99), Irwin Quick-Grip clamps ($12.99/pair). These handle most tasks in a remodel around tub, from scraping old caulk to securing bathtub wall panels. Add a 16ft tape measure ($5.99) for measurements and a 4ft level ($9.99) to keep everything straight during your easy tub surround install. Finish with drop cloths ($4.99), painter tape ($3.99), paint roller ($4.99), and a putty knife ($2.99). Total kit lands at $89.95, perfect for contractor-free updates.
| Tool | Store | Price | Why Needed | Alternative |
|---|---|---|---|---|
| Caulk Gun | Harbor Freight | $8.99 | Applies silicone sealant evenly for bathtub re-caulking and trim | Borrow from neighbor |
| Utility Knife | Harbor Freight | $4.99 | Cuts peel-and-stick tiles, removes old grout | Box cutter |
| Grout Float | Harbor Freight | $6.99 | Spreads grout for inexpensive bathroom tiles | Plastic scraper |
| Clamps | Harbor Freight | $12.99/pair | Holds panels during adhesive tub surround dry time | Bands or weights |
| Tape Measure | Harbor Freight | $5.99 | Exact cuts for bathtub liner installation | Ruler extensions |
| Tile Cutter | Home Depot Rental | $25/day | Slices subway tiles cleanly for backsplash | Manual scorer ($15) |
For rare needs like a tile cutter, rent at $25/day from Home Depot instead of buying a $50+ model. This kit supports everything from mold removal with a vinegar solution to installing low-flow showerhead or LED lighting. It is ideal for keeping costs low in your affordable bathroom update while ensuring pro-level results.
Affordable Material Sourcing Tips
Scored PVC panels at Lowe’s 40% off ($12/sheet vs $20) during President’s Day sale. Smart sourcing turns a budget bath ideas list into reality for your keep existing tub project. Hit clearance aisles first for 50% off discontinued subway tile, perfect for a tile backsplash or shower remodel without demo. These spots overflow with overstock mosaic accents, neutral colors, or white grout options that fit any gray palette or beige tones scheme.
- Clearance aisles snag 50% off discontinued subway tile for bathtub surround refresh.
- Amazon Warehouse deals deliver acrylic liners at $45, half price for liner installation.
- Habitat ReStore yields faucets for $20, plus budget vanity or Delta faucets finds.
- Price tracker apps alert on Home Depot deals or Lowes specials for grout or silicone sealant.
- Bulk buy hits 10% discount threshold on beadboard panels or shiplap walls.
These strategies cover plumbing fixtures, towel bars, or exhaust fan upgrades on the cheap. Mix in Wayfair discounts for robe hooks, Amazon finds for paint roller supplies, or Habitat steals for over-toilet storage. Apply to wainscoting, semi-gloss paint, or tub reglazing kits like Rustoleum for a modern farmhouse bath or coastal bathroom look. Track sales for maximum savings in your value-adding remodel, boosting curb appeal and ROI without breaking the bank.
Prepping the Space
Proper prep prevents 80% of DIY disasters and saves cleanup time when you remodel around an existing bathtub. You want to set up right so nothing goes wrong during your budget-friendly remodeling project. Start with basic safety like wearing gloves and eye protection, then move to protecting your space. This keeps dust and mess from spreading to the rest of your home during the alcove tub makeover. Think about turning off the water supply early to avoid surprises. Good prep means your shower remodel stays on track without extra costs from damage. Lay down drop cloths everywhere and tape off doorways to contain everything. It takes about an hour total, but pays off big in a cleaner finish. Many folks skip this and end up scrubbing hours later. Focus on affordable bathroom update tools like painter’s tape and plastic sheeting from the dollar store. Once protected, clearing out cabinets makes room for safe work. Power down the right breaker to kill the electricity risks near water. Ventilation with a fan pulls out fumes from any cleaners or paints. This setup turns your low-cost bath renovation into a smooth weekend project. You save money by avoiding contractor calls for fixes. Pros always stress this first step for any no-demo remodel around the tub.
After safety basics, tackle detailed clearing to protect floors and walls. Use old towels under the existing bathtub for drips. Empty everything from shelves to avoid breakage during your DIY efforts. Label bags for easy return later. This DIY bathtub refresh needs space for tools like a utility knife and caulk gun. Check for loose tiles or mold now, as it is easier before heavy work starts. A quick vinegar solution wipe-down preps surfaces for new bathtub wall panels or peel-and-stick tiles. Time yourself to stay efficient, aiming for under an hour. Common oversights like forgetting outlet covers lead to shocks, so cover them thickly. Your budget bath ideas shine when prep is thorough. It sets the tone for installing waterproof panels or a cheap shower enclosure without hassle. Think ahead to disposal of old bits at the hardware store bin for just a few bucks. This keeps your small space functional and on budget.
With the area ready, you can adjust fixtures to improve your remodel around the tub look. Prep also spots issues like rusty drain covers early. Grab cheap supplies like FrogTape to mask trim perfectly. This prevents paint bleeds on your keep existing tub plan. Ventilation clears steam from testing faucets later. Overall, solid prep makes your inexpensive bathroom tiles or tub re-caulking go fast. You end up with a spa-like feel on a dime. Safety first turns potential mess into a pro result every time.
Clearing and Protecting the Area
Step 1: Remove shower curtain/rod (5min), Step 2: 4mil plastic sheeting ($12/100ft) over floor/outlets, Step 3: FrogTape Delicate ($7/roll) on trim. These first moves protect your bathtub surround work from scratches and spills in a budget-friendly remodeling setup. Plastic sheeting catches water and debris while you handle the existing bathtub. Tape edges down firm so it stays put during movement. This takes about 15 minutes but saves hours scrubbing later. Next, Step 4: Empty cabinets and vanities into labeled boxes, Step 5: Wipe surfaces with a baking soda scrub for mold removal. Clear space lets you reach behind for old caulk or loose bathtub trim. Folks often forget outlet covers, risking shocks near wet areas. Cover every one thick. Your shower remodel flows better with room to swing tools like a level or tape measure. Thrift remodel tips include reusing the curtain elsewhere after cleaning. Total time hits 45min, perfect for a quick start on your affordable bathroom update.
Step 6: Power off the breaker for bathroom circuits to kill any live wires. Test outlets with a cheap voltage checker from Harbor Freight. Step 7: Set up ventilation with an exhaust fan or open window fan combo. This pulls out dust from grinding old grout or refreshing the bathtub re-caulking. Good airflow prevents headaches during peel-and-stick tiles or adhesive tub surround installs. Common mistake is rushing without power down, leading to scary sparks. Protect switches too with tape. This prep shines for low-cost bath renovation around the tub. You avoid 90% of cleanup headaches. Grab drop cloths for extras, folding them neat under the existing bathtub. Once done, your space is primed for safe, mess-free work on PVC tub walls or silicone sealant jobs. It is the foundation of any contractor-free update.
Extra tip: Snap before-after photos now for your records. This clearing protects resale value with a clean ROI bathroom upgrade. Ventilation also preps for paint like semi-gloss moisture-resistant coats later. Your no-demo remodel stays dry and safe. End with a final walk-through to spot misses. Solid prep like this makes budget hardware swaps easy and fun.
Removing Old Fixtures Safely
Cut old caulk with carbide scraper ($8) before prying towel bars, prevents wall damage during your DIY bathtub refresh. Start by shutting off shutoff valves under the sink or tub to stop water flow and add a moisture barrier. Use PB Blaster on rusty towel bars, let sit 10min, then pliers to twist free. This keeps your alcove tub makeover walls intact for new subway tiles or beadboard panels. Wrap fixtures in towels to muffle drops and protect against common mistakes avoid. For the showerhead replacement, channel locks loosen it gently, then wrap new one with teflon tape for no leaks. Disposal goes easy in a $10 hardware store bin with salvage materials, no landfill runs needed. Safety precautions first avoids slips on wet floors, so keep paths clear. This fits your remodel around tub without demo chaos. Many update to budget Delta faucets or Moen showerheads here for low-flow savings.
Overflow plate and drain cover comes next with needle nose pliers after soaking in vinegar solution. Pry slow to avoid scratching the existing bathtub porcelain, prepping for surface restoration or reglazing. Check pipes for corrosion while open. Reinstall or swap for a modern pop-up. Always test water off fully before tools near plumbing fixtures. Common error is forcing stuck bits, cracking tiles. PB Blaster saves the day on towel bars and robe hooks too. Bag hardware separate for reuse in your inexpensive bathroom tiles or budget handles phase. This removal takes 30min max, keeping your low-cost bath renovation on track. Wipe residues with homemade cleaner for fresh starts on caulk replacement or grout refresh.
Post-removal, inspect for mold and hit with mildew-resistant primer or bleach wipe. This uncovers issues early for your cheap shower enclosure, budget shower doors or bathtub liner plans. Save screws for new towel bars or toilet paper holders. Proper sequence boosts your functional bathroom vibe. Pros note 70% of leaks start at old fixtures, so this fixes them cheap. Your space now welcomes adhesive backsplash or LED bulbs bathroom adds. Safe removal ensures a smooth shift to the fun updates ahead.
Updating Walls and Surrounds
Wall upgrades deliver 60% visual impact for 25% cost in a cost-saving tub surround project around your existing bathtub. You get a fresh look without tearing out the tub or spending a fortune on a full shower remodel. Focus on the bathtub surround first, since it frames everything and protects against water damage. Simple changes like easy-install panels or a quick waterproof paint job turn a dated alcove tub into a bright, clean space. This approach fits any affordable bathroom update, especially if you stick to DIY methods.
Before jumping into specifics, think about your goals for this low-cost bath renovation. Panels offer the fastest install with no mess, ideal for a weekend project DIY bathtub refresh. Backer board preps for recycled tiles if you want that classic look on a budget. Painting with low-voc paint keeps things super cheap and easy for renters or quick flips. Each option works around the existing tub, saving you demo costs. Pick based on your skill level and how long you plan to stay in the home. Materials from big box stores run under $200 total, and most jobs wrap in a day.
For best results in an alcove tub makeover, always check for mold behind old surrounds first. A vinegar solution scrubs it away cheap. Use silicone sealant at edges to prevent leaks. Neutral colors like white grout or budget grout beige tones brighten small spaces. Add peel-and-stick tiles for accents if you want pattern without grout lines. These changes increase resale value and give high ROI on bath updates. Pair with a low-flow showerhead for function and savings.
Waterproof Wall Panel Installation
GoodHome 8-panel PVC panels kit ($189 at Home Depot) covers a 60×32 tub in 4 hours, making it a top pick for tub skirt panels in a cheap shower enclosure. These budget-friendly waterproofing panels beat tile every time for speed and ease in a no-demo remodel around tub. No grout means less cleaning, and they mimic tile or stone looks affordably. Perfect for keeping your existing tub while updating the surround.
Installation stays simple with these steps:
- Apply acrylic adhesive ($15/tube) in dots every 12 inches on the back of each panel.
- Press firmly and use a level tool to check alignment before it sets.
- Run a silicone edge bead with silicone caulk along seams and tub edges for waterproofing.
Compared to traditional tile, this takes 1/10th the time with zero grout haze. Cut panels with a utility knife or jigsaw; score and snap for straight lines. Diagram it like this: mark tub outline on panel, cut 1/4-inch inset for flange overlap.
Finish with caulk at corners using a caulk gun. This easy tub surround handles humidity better than paint alone. Add subway tiles or side panels as a border for style. Total cost stays low for a contractor-free weekend project. Users love how it transforms a tired bath into a spa-like feel on a small budget.
DIY Tile Backer Board Options

HardieBacker 1/4-inch cement board ($12/sheet) + thinset ($18/bag) = $110 wall prep for a solid base in your DIY bathtub refresh. This sets up inexpensive bathroom tiles around the tub without breaking the bank. Screw it over studs in an 8-inch grid pattern for stability. Great for a cost-effective remodel if you want real tile durability.
Compare these three backer options in a quick table:
| Option | Cost per Sq Ft | Best For |
|---|---|---|
| Cement board | $1.20 | pro tips budget, everyday use |
| Kerdi membrane | $1.80 | Full waterproofing |
| GreenGuard | $0.90 | Budget picks |
For cutting, use a circular saw with duct tape over the line to avoid chipping. Apply thinset with a notched trowel, then screw down tight. Tape seams with mesh and thinset coat for a smooth tile base.
This prep shines in a tub-to-shower conversion, DIY tub regrout or simple alcove update. Pair with white grout and mosaic accents for modern farmhouse vibes. Tools like a tape measure and level keep it precise. Expect 2-3 hours per wall. It holds up to steam and splashes, adding value to your functional bathroom without pro help.
Painting or Tiling Around the Tub
BEHR Premium Plus Wet Environment ($42/gallon) covers 400 square feet – 2 coats perfect for a fast waterproof paint bathroom walls job around the tub. This moisture-resistant paint with anti-fungal sealant in semi-gloss handles humidity like a champ in your small budget bath. Zinsser primer first blocks stains for a pro finish.
Paint method: Clean walls, prime with Zinsser, roll on two semi-gloss coats. Total time 3 hours. Tile method uses 4×8 subway ($1.20/sqft) + affordable sealant white grout over backer board, clocking 8 hours. Paint wins for speed in thrift remodel tips, while tile adds texture for coastal bathrooms. Finish edges with a caulk line using silicone for clean seams.
Both suit a no-demo remodel keeping the existing tub. Go paint for minimalist design, tile for shiplap or beadboard vibes. Use drop cloths, painter tape, and a paint roller. Refresh grout on old tiles first with a grout float if mixing styles. These picks maximize space with neutral colors, turning your bath modern on budget bath ideas. High curb appeal for resale.
Flooring Solutions
Flooring upgrades with humidity reduction prevent water damage while staying 96% waterproof. When you remodel around an existing bathtub, good flooring choices keep costs low and protect against splashes from your alcove tub makeover. Vinyl or laminate surround options fit perfectly into a DIY bathtub refresh, avoiding the hassle of ripping out old tiles. These materials resist moisture better than basic wood, making them ideal for a budget-friendly remodeling project that saves you from future leaks.
Start with a quick assessment of your current floor. Sweep away debris and check for soft spots near the tub base, common in older affordable bathroom updates. Add a thin steam barrier underlayment to even things out, then pick planks that mimic hardwood without the price tag. This approach works great for a no-demo remodel, letting you keep the existing bathtub intact while refreshing the whole space. Pair it with peel-and-stick tiles in high-traffic areas for extra durability on a small budget with amazon budget buys.
Think about the room’s flow too. A transition strip or inexpensive molding at doorways ties everything together neatly. For a weekend project, these floors install fast, often in a day, boosting your bathroom’s resale value tub with wayfair deals without major spending. Homeowners report saving up to 70% compared to full tile jobs, and the waterproof rating holds up around daily showers. It’s a practical step in any low-cost bath renovation.
Vinyl or Laminate Around the Tub Base
LifeProof Fresh Oak vinyl plank ($2.49/sqft Home Depot lowes sales) offers click-lock design with no glue needed. This makes it a top pick for working around your existing bathtub in a budget bath ideas setup. Cut pieces with a jigsaw for a precise fit at the tub base, leaving a small gap to prevent buckling from moisture. It’s perfect for an easy tub surround or trim around bathtub project without demo work.
Installation goes like this: First, lay down 1/4-inch underlayment for a stable base and sound dampening. Next, keep a 1/4-inch gap along the tub edge to allow for expansion, then finish with a transition strip for a clean look. Compared to ceramic, vinyl costs about 1/5th as much and takes 1/3rd the install time, ideal for contractor-free updates or handyman projects. Grab a utility knife and level tool from Harbor Freight to keep expenses down.
- Measure the space twice around the bathtub base or tub apron before cutting.
- Snap planks together starting from the farthest wall.
- Use painter’s tape to protect the tub during cuts.
Many folks pair this with bathtub re-caulking for full protection. The result? A fresh modern farmhouse bath vibe that maximizes space on a Saturday afternoon with small bathroom hacks. It’s durable against kids’ splashes and adds a spa-like vibe affordably without breaking the bank.
Sealing Edges for Waterproofing and DIY Tub Regrout
GE Tub & Tile silicone ($7/tube) comes with a 10-year mold-free guarantee, making it essential for your shower remodel edges. Skip acrylic caulk, which cracks fast; pure silicone flexes with tub movement in a cost-effective remodel. Apply along the flooring-to-tub joint to block water from sneaking underneath during everyday use, perfect for end panels or acrylic sheets.
Here’s the simple process: Squeeze a 1/4-inch bead into the gap using a caulk gun, then smooth it with a wet finger or a $5 caulk finishing tool. Let it cure for 24 hours before testing, water beading up and staying put for 10 minutes. This step ties into your waterproof PVC panels or PVC tub walls, ensuring a dry subfloor in wet zones.
- Clean edges with a vinegar solution and baking soda scrub first.
- Apply silicone in one steady pass, avoiding gaps.
- Tool the bead for a pro finish, wiping excess immediately.
Testing prevents callbacks in your thrift remodel tips like thrift store finds or ikea hacks. Pair with grout refresh or mold removal for a complete functional bathroom upgrade. Homeowners see no issues after years, saving on tub reglazing or liners. It’s a quick fix that boosts longevity in your bathroom on a budget.
Plumbing and Fixtures Upgrades
Fixture swaps offer 40% spa upgrade for $150 investment. When you remodel around an existing bathtub, changes to plumbing and fixtures make the biggest difference without tearing everything out. You keep the tub in place and focus on affordable bathroom updates that freshen the look and improve function. Think about swapping out old faucets, drains, and showerheads for ones that match your budget bath ideas with budget accessories. These tweaks turn a tired alcove tub into a spot you actually enjoy using every day.
Start with an overview of what works best in a DIY bathtub refresh. Check your current setup first, like shutoff valves and water pressure, to avoid surprises. Pick finishes that tie into your outdated tub surround or peel-and-stick tiles for a pulled-together color scheme refresh. Many folks pair these with tub re-caulking or a quick grout refresh to get that spa-like feel.Low-cost bath renovations like this add value without high costs, especially if you aim for neutral colors or a gray palette around the tub.
For the best results in your shower remodel, plan a weekend project around these upgrades. Grab basics like plumbers putty, Teflon tape, and a silicone sealant from local stores. Test everything after install to catch leaks early. These steps fit right into keeping your existing tub like an 80s tub update while updating the cheap shower enclosure. You end up with a family bathroom refresh that feels modern, maybe even coastal with the right fixtures.
Replacing Faucets and Drains on a Budget
Delta Trinsic centerset $89 on Amazon makes a 2-handle easy swap under 1 hour. Updating faucets and drains gives your bathtub remodel a clean, pro look without demo work. This fits perfectly into a no-demo remodel around the existing bathtub, saving you money on plumbers. Focus on budget-friendly options that match your faucet upgrade goals and tie into PVC tub walls or adhesive tub surround with laminate to tile or formica replacement.
Follow these simple steps for success. First, turn off the shutoff valves under the sink or tub to stop water flow. Next, disconnect the P-trap with a wrench, emptying any water into a bucket. For the new faucet, apply plumbers putty, about $4 a tub, around the base for a tight seal. For the drain, grab a Fluidmaster universal kit at $19 that fits most setups. Hand-tighten everything, then use a leak test by running water for 5 minutes.
- Shut off valves completely.
- Disconnect P-trap carefully.
- Install new faucet with plumbers putty.
- Fit drain assembly snugly.
- Test for leaks with full run.
These moves work great for an alcove tub makeover, especially with caulk replacement nearby. Pick finishes like chrome to match towel bars or robe hooks, with soap dish mount or storage solutions. Your small budget bath gets a fresh lift, ready for subway tiles or beadboard panels above.
Adding a Showerhead or Handheld
Moen Magnetix handheld at $47 brings 5-function magnetic dock to your tub. Handhelds shine in a remodel around tub, letting you rinse off easy without a full tub-to-shower conversion. This low-flow water-saving showerhead option pairs well with your existing bathtub, adding convenience to any cheap shower enclosure or waterproof panels with cultured marble edges.
Installation stays simple and quick. Wrap threads with Teflon tape for no leaks, usually two to three wraps. Look for a 2.5 GPM flow restrictor to keep pressure strong yet water-smart. For handhelds, add a hose and wall bar for $25 total. Pressure test by running hot and cold for a few minutes. Note the EPA WaterSense certification, which saves 20% on bills over time with eco-friendly options.
- Apply Teflon tape generously.
- Check flow restrictor rating.
- Mount hose and bar securely.
- Run water to test pressure.
This upgrade boosts your DIY bathtub refresh and works with bathtub wall panels or a shower curtain replacement. It creates that spa-like feel in a bathroom on budget, perfect alongside mold removal or LED lighting. Enjoy the rinse without hassle in your cost-effective remodel.
Lighting and Ventilation Improvements
Lighting and ventilation or ventilation fan upgrades improve safety and air quality instantly with ventilation importance. These changes work great in a budget-friendly remodeling project around your existing bathtub. You keep the tub in place while making the space brighter and fresher. Poor lighting leads to slips near the bathtub surround, and stale air breeds mold on the walls. Simple swaps here give your bathroom a quick lift without big costs or demo work.
Start with the basics in your DIY bathtub refresh. Check fixtures above the vanity or shower area. Many older setups use too much power and give off harsh light. Pair that with a weak fan, and you have foggy mirrors and damp smells after every use. Upgrading both creates a safer spot for daily routines, especially in a small budget bath. Think about how this fits your alcove tub makeover, where you focus on the tub area but refresh the whole room.
For the best results, combine these with other low-cost bath renovation ideas like peel-and-stick tiles or a new shower curtain. The total spend stays under $100, and you get better visibility for tasks like shaving or applying makeup. Good airflow also helps with tub reglazing or caulk jobs, keeping things dry with moisture control. Homeowners often see this as a good choice in a no-demo remodel that improves the room’s feel without touching plumbing.
LED Lighting Swaps
Feit Electric 4-pack 65W equivalent vanity lights at $22 on Amazon give 800 lumens each. These are perfect for a budget bath ideas update around your existing tub. Swapping out old bulbs starts with checking the GFCI circuit to avoid shocks near water. Turn off power at the breaker, then test outlets with a plug-in tester from Harbor Freight. This keeps your remodel around tub safe and simple.
Pick dimmable LED energy-efficient lighting bulbs in 2700K warm white for a cozy glow over the vanity. Aim for 1100 total lumens across fixtures to light up the bathtub surround without glare. Compared to incandescents, you save 80% on energy, cutting bills in your keep existing tub project. Install by twisting into sockets, and add a dimmer switch if wiring allows. This pairs well with inexpensive bathroom tiles or a low-flow showerhead for a full affordable bathroom update with vanity coordination.
Users love how these lights brighten corners for better safety during a shower remodel or tub-to-shower conversion, plus mirror refresh. They last 25 times longer than old bulbs, so no frequent changes. Match with neutral colors like beige tones on walls for a spa-like feel. In a weekend project, this swap transforms the space, making mornings easier and resale value higher.
Exhaust Fan Upgrades
Broan 50CFM fan at $45 works for 50sqft bathrooms and meets IRC code. This is a top pick for cost-effective remodel in a keep existing tub setup. It pulls moist air fast, preventing mold on bathtub wall panels or PVC tub walls with exhaust improvement. Proper sizing matters, so match CFM to room size for effective venting.
| Bathroom size | CFM needed |
|---|---|
| 0-50 sqft | 50 CFM |
| 51-100 sqft | 80-100 CFM |
| 101+ sqft | 120+ CFM |
Installation uses a roof or attic vent with 4-inch duct for quiet operation. Look for HVI certification and noise under 1.0 sones to avoid humming. Cut a hole in ceiling drywall with a utility knife, secure the housing, then wire to switch. Seal with silicone sealant. This fits your savings tips and contractor alternatives in thrift remodel tips while improving air in the bathtub surround.
After install, test by running for 20 minutes post-shower. It pairs with LED lighting for full ventilation in a bathroom on budget. Reduces humidity that harms acrylic liners or grout refresh jobs. Many do this in a functional bathroom update like powder room update or guest bath remodel, gaining a modern farmhouse bath vibe without high costs. Expect clearer mirrors and fresher smells right away.
Finishing Touches for Master Bath Budget
Details give a contractor-quality finish without extra cost in your budget-friendly remodeling around an existing bathtub. These last steps make your alcove tub makeover look pro and last longer. Focus on clean lines, smart storage, and solid seals to wrap up the DIY bathtub refresh. You avoid water issues and add function without demo work.
Start with caulk replacement to block leaks, then hang accessories that fit tight spaces. Add peel-and-stick tiles or floating shelves for style. Pick moisture-resistant paint on walls if needed, or refresh grout around the bathtub surround. These touches turn a basic bath into a functional spot. Use painter’s tape for crisp edges everywhere.
Budget items like a $10 caulk gun or over-toilet storage maximize every dollar. Test fixtures, run water to check seals, and step back for the full view. Your low-cost bath renovation now has that spa-like feel. Friends notice the details most, boosting the room’s value without big spends.
Caulking and Sealing Properly
Fresh silicone sealant prevents 95% of water damage claims in bathrooms with an existing bathtub. Old caulk cracks and lets moisture behind the bathtub wall panels, leading to mold. Remove it first with a $8 chemical stripper, then wipe surfaces clean using acetone on a rag to degrease surround. This preps for a tight bond.
Pro technique uses painter’s tape to guide straight lines along the tub edge and walls. For deep gaps in the shower enclosure, push in backer rod to fill space before caulking. A $10 caulking tip set smooths it perfect, no mess. Cut the tube at a 45-degree angle for control with your caulk gun. Smooth with a wet finger right away, or use scratch removal tools for any marks.
Let it cure 24 hours before water tests. This bathtub re-caulking step saves on repairs later. Pair with DIY tub regrout around peel-and-stick tiles for a full seal. Your affordable bathroom update stays dry and fresh for years, just like new installs.
Adding Storage and Accessories
A $35 Wayfair floating shelf set plus a $22 towel warmer creates a functional spa around your existing tub. These picks fit small beginner remodel budget bath remodels without eating space. Mount shelves above the toilet or beside the bathtub surround for towels and soaps.
- Over-toilet etagere at $49 stacks vertically to hold extras, perfect for grab bar install.
- Magnetic strips for $12 grab razors and tweezers on tile.
- Robe hooks in a 3-pack for $15 near the door.
- Tension rod with wire shelves adds pantry-style spots with non-slip mat below.
- Peel-and-stick baskets tuck into corners for bottles.
Space-max tip: measure twice with a tape measure, use a level for straight installs. Add a low-flow showerhead or robe hooks to increase daily ease with budget safety upgrades. These budget bath ideas keep clutter off floors in tight coastal bathroom setups. Total under $150, yet it feels custom and organized.
Common Mistakes to Avoid
These 5 errors cost $500+ in fixes, learned firsthand from my own budget-friendly remodeling around an existing bathtub. I rushed a DIY bathtub refresh once and paid for it later. First, folks skip planning the layout, cramming in a budget vanity that blocks tub access. Solution: measure twice with a tape measure and sketch your alcove tub makeover on paper first. Second, cheap peel-and-stick tiles lift from steam, so pick waterproof panels or PVC tub walls instead. Third, ignoring electrical means no spot for LED lighting, leaving your affordable bathroom update dim. Add floating shelves high up for light play. Fourth, bad grout choices stain fast, pick white grout or epoxy for easy tub reglazing vibes. Finally, no exhaust fan leads to mold, so install one with a timer during your no-demo remodel.
I helped a buddy remodel his bathroom on a small budget. We avoided common problems by using thrift tips like over-toilet storage and swapping in a low-flow showerhead. He kept his existing tub, added bathtub wall panels with fiberglass repair, and got a spa-like feel without contractor fees. Stats show 70% of bathroom regrets tie to poor prep, per home improvement surveys. For your remodel around tub, list problems upfront: check slope, test caulk, and vent properly. This saves money on a weekend project, turning a cheap shower enclosure into lasting value.
Avoiding these turns your low-cost bath renovation into a win. I once saw a flip house where skipping fan install cost $1,200 in fixes alone. Use a level tool for shelves, painter tape for clean lines on subway tiles, and a caulk gun for bathtub re-caulking. Focus on functional bathroom tweaks like robe hooks and towel bars from budget hardware spots. Your ROI increases with good choices that raise resale value without the trouble of tub-to-shower conversions.
Skipping Waterproofing Steps
My neighbor’s $2k mold remediation after cheap paint flaked hit hard during his bathtub surround attempt. He tiled over the existing bathtub without basics like vapor barrier install, and water wicked behind for a nasty surprise. In budget bath ideas, waterproofing feels optional but isn’t. Insurance claims spike here: 40% of bathroom water damage ties to poor sealing, says industry data. Common failures kill cheap remodels fast.
- No membrane behind tile lets moisture seep into walls. Fix it with Kerdi sheet for your shower remodel, applied before adhesive tub surround or inexpensive bathroom tiles go up, using sustainable panels.
- Wrong caulk shrinks and cracks. Use silicone sealant only, not acrylic, for bathtub trim and shower curtain replacement edges.
- Poor floor slope pools water. Aim for 1/4 inch per foot drop to the drain, checked with a level tool during low-cost bath renovation.
- No fan timer means lingering humidity. Wire in an exhaust fan to run 20 minutes post-shower for mold removal prevention.
These steps saved my alcove tub makeover. I grabbed a refinishing kit for tub refinishing, paired it with semi-gloss paint and a primer coat on beadboard panels. Vinegar solution cleaned first for porcelain touch-up, then silicone caulk sealed everything. No more worries in that moisture-resistant setup.
For your DIY bathtub refresh, test with a baking soda scrub and homemade cleaner before tiling. Add mosaic accents or neutral colors like beige tones for a modern farmhouse bath look. Grout refresh with white grout ties it together. This cost-effective remodel around the tub boosts curb appeal, all while keeping costs under control on a bathroom on budget.
Cost Breakdown and Savings Tips
Total project: $1,247 vs $8,500 full remodel = 85% savings. Keeping your existing bathtub lets you focus cash on high-impact changes like peel-and-stick tiles and a fresh bathtub surround. I planned this budget-friendly remodeling around an alcove tub, skipping demo costs that eat up thousands with smart budget choices. Realtor.com data shows bathroom updates like this give a 7% ROI boost, especially when you stick to affordable bathroom updates such as refinishing the tub and adding waterproof panels.
Here’s the detailed breakdown in a table. I tracked every category from planned budgets to actual spends and the simple methods that saved money. For example, tub reglazing with a Rustoleum kit dropped costs way down, and sourcing budget hardware from Home Depot deals made towel bars and robe hooks cheap. This low-cost bath renovation turned a weekend project into real value without contractors.
| Category | Planned | Actual | Savings Method |
|---|---|---|---|
| Epoxy paint kit bathtub refinishing kit | $250 | $180 | Amazon find on sale |
| Peel-and-stick tiles for surround | $400 | $280 | Lowes specials, buy 20% less |
| Adhesive tub surround panels | $300 | $210 | Wayfair discount, PVC option |
| Faucet upgrade and low-flow showerhead | $200 | $140 | Delta faucets on clearance |
| Caulk, grout refresh, silicone sealant | $100 | $65 | Harbor Freight tools, DIY |
| LED lighting, exhaust fan | $150 | $110 | Reuse existing hardware |
| Budget vanity, floating shelves | $300 | $220 | Over-toilet storage thrift |
| Misc: paint, beadboard, trim | $150 | $42 | Home Depot paint sales |
Grand total planned: $1,850. Actual: $1,247. Savings: $603. Final tips to max your advanced DIY DIY bathtub refresh: Hit sales at stores for inexpensive bathroom tiles, reuse old hardware like the medicine cabinet, and DIY everything from caulk replacement to grout refresh, including chip repair and rust stain treatment. Grab a utility knife, caulk gun, and level tool from Harbor Freight. This no-demo approach keeps your functional bathroom looking spa-like on a small budget with proper prep for remodel, especially when you compare it to typical [ small bathroom remodeling costs] that can easily exceed $8,000.
About the Author
Taylor Jones is a University of California graduate with a degree in Interior Design. As the founder of a thriving home renovation company based in California, Taylor has spent over eight years specializing in bathroom remodeling, accessible design, and luxury bath installations. She is also a contributing writer and editor for USA Shower and Bath, where she shares expert insights to help homeowners make confident, stylish, and functional upgrades to their spaces.
